Hello Bloggers! I have something special for today's post! How does
everyone feel about zipper pouches? The instructions for the pattern are
below, and you will be able to get the pattern on my site ithinksew for
free! Enjoy!

Cut out the Fabric
Draw the patterns directly onto the wrong side of a single layer of fabric. Cut out the exterior and lining. If you would like to add an interfacing, draw and cut it out. Fuse the interfacing on the wrong side of the exterior front and back pieces following the manufacturer’s guide.
EXTERIOR
(2) Front and Back Pieces
(1) Loop Piece (Optional)
INTERIOR
(2) Lining Front and Back Pieces
INTERFACING
(2) Front and Back Pieces
(2) Lining Front and Back Pieces
(2) Front and Back Pieces
Make the Darts
Fold the exterior front piece triangle darts, pin and sew the darts, backstitching on both ends, see Picture 1.
 | ||
| Picture 1 |
Cut the dart seam. Repeat this process for the lining. For an optional strap, lay a ribbon vertically across the center of the exterior back piece’s right side. Fold it in half to create a loop; pin and baste the ribbon, see Picture 2.
 | |
| Picture 2 |
Attach the Zipper
Zip the zipper and lay it on the exterior front with right sides together. You will be able to see the wrong side of the zipper, see Picture 3.
 |
| Picture 3 |
Measure the length of the zipper coil and tape only on one side. If the excess length is over ½”, cut off any excess tape. Pin the zipper and panel in place. Stitch the panel and zipper using a zipper foot, sewing close to the tape edge. Backstitch to secure.
Place the lining piece onto the zipper and exterior with right sides together. The zipper will now be between the exterior and lining. Pin and sew the zipper close to the coils. Backstitch on both ends, see Picture 4.
 | |||
| Picture 4 |
After sewing the lining to the zipper, flip the lining towards the exterior with wrong sides together and press. Topstitch the exterior close to the coils, see Picture 5.
 |
| Picture 5 |
Sew the exterior back piece and lining back piece onto the zipper in the same manner, see Pictures 6-7.
 |
| Picture 6 |
 |
| Picture 7 |
The result should look like Picture 8.
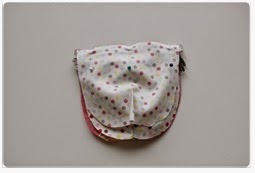 | |||
| Picture 8 |
Sew the Exterior and Lining
Place the exterior front and back pieces with right sides together. Also place the lining front and back pieces with right sides together. To make it easier to turn the pouch right side out, leave the zipper open when sewing around the bag. Pin and sew along the exterior and lining seam, backstitching several times over the zipper and leaving a small gap for turning, see Picture 9.
 |
| Picture 9 |
Clip the curved corner seams, see Picture 10. The zipper coil should be towards the lining.
 |
| Picture 10 |
Assemble the Exterior and Lining
Trim the corner seam, see Picture 11.
 |
| Picture 11 |
Turn the pouch right side out and fold the opening seam allowance inside. Pin and stitch the lining opening, see Picture 12. Tuck the lining into the exterior. If necessary, push out the corners with a turning tool or capped pen.
 |
| Picture 12 |
2 comments:
Super Cute!
Thanks!!!
Post a Comment